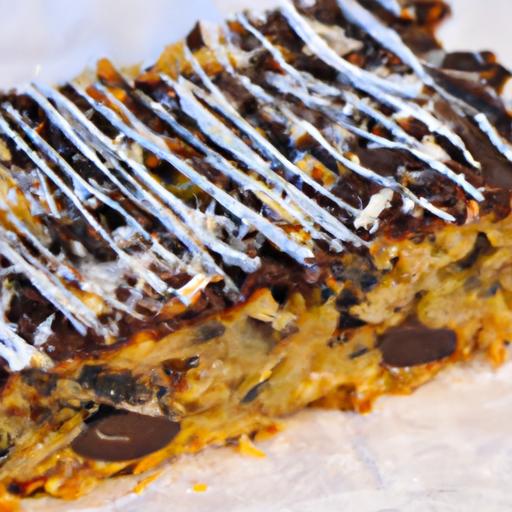
There’s something irresistibly enchanting about a dessert that comes together in layers-each bite a symphony of textures and flavors that unfold like chapters in a appetizing story. Enter the seven layer magic bar: a classic treat that masterfully combines everything from gooey caramel and crunchy nuts to silky chocolate and buttery graham cracker crust.Whether you’re a seasoned baker or a curious kitchen experimenter, this guide will take you through the art and science of assembling these decadent bars. Prepare to discover how simple ingredients can transform into a magical mosaic of taste, making seven layer magic bars a timeless favorite for any occasion.
seven Layer Magic Bars are a timeless treat that delight with every bite-an irresistible mosaic of sweet,nutty,and gooey textures. Originating as a mid-century American favorite, these rich bars blend simplicity and indulgence, making them a perfect go-to for both novice bakers and seasoned pros. Whether you’re craving a nostalgic dessert or aiming to impress guests with a multi-textured masterpiece, mastering the building blocks of this layered delight unlocks endless possibilities.
Prep and Cook Time
- Prep time: 15 minutes
- Cook Time: 25-30 minutes
- Total Time: 40-45 minutes
Yield
Approximately 16 bars (serving size: 2×2 inch)
Difficulty level
Easy
Ingredients
- 1 1/2 cups graham cracker crumbs (approximately 12 full sheets, finely crushed)
- 1/2 cup (1 stick) unsalted butter, melted
- 1 cup sweetened shredded coconut (unsweetened can be used for a lighter touch)
- 1 cup semisweet chocolate chips
- 1 cup butterscotch chips (optional but highly recommended for that caramel richness)
- 1 cup chopped nuts (walnuts, pecans, or almonds work beautifully)
- 1 can (14 oz) sweetened condensed milk
Mastering the Perfect Crust for a Flawless Foundation
The crust is your magic bar’s sturdy canvas, marrying a buttery crunch with the rich sweetness of graham crumbs. Begin by finely crushing graham crackers to create an even texture that holds together without becoming dense. Combining the crumbs with melted butter binds everything into a buttery, golden base once baked.
Press the mixture firmly and evenly into your baking dish. This ensures each bar will slice cleanly and hold the subsequent layers without crumbling. For a slight twist, consider lightly toasting the crumbs before mixing with butter to intensify that warm, caramelized flavor.
Layer by Layer Guide to Achieving Optimal Taste and Texture
Each layer plays a distinct role, contributing flavor and texture contrasts that make Seven Layer Magic Bars legendary.
- Crust: Firm, buttery, and golden-forms the essential base.
- Sweetened condensed milk: Poured over the crust, this thick liquid seeps into the layers, baking into a luscious caramel-like binder.
- Chocolate chips: Their melting creaminess balances the crunch, creating pockets of melty sweetness.
- Butterscotch chips: A delightful addition that elevates the flavor with buttery caramel notes.
- Coconut: Provides subtle chewiness and a tropical hint that awakens the palate.
- Chopped nuts: Toasted for crunch and warmth, nuts add a complex texture and toasty depth.
To optimize melting and texture contrasts,sprinkle each component evenly and avoid over-layering any single ingredient. This thoughtful assembly ensures every bite reveals the perfect harmony of gooey, crunchy, and chewy sensations.
Expert Tips for Customizing Your Magic Bars with Unique Flavors
while traditional Seven Layer Magic Bars have a sacred recipe, don’t hesitate to infuse your own soul into this treat. Mix and match candies,nuts,and even dried fruits to create personalized versions.
- Swap butterscotch chips with white chocolate or peanut butter chips for option flavor notes.
- Add dried cranberries or cherries for bursts of tart brightness.
- Use macadamia nuts or hazelnuts to introduce a creamier, richer crunch.
- For a tropical twist, experiment with toasted macadamia nuts and pineapple bits.
- Drizzle a light sea salt caramel sauce after baking for a wow factor that balances sweetness.
Ingredients
- 1 1/2 cups graham cracker crumbs
- 1/2 cup (1 stick) unsalted butter, melted
- 1 can (14 oz) sweetened condensed milk
- 1 cup semisweet chocolate chips
- 1 cup butterscotch chips
- 1 cup sweetened shredded coconut
- 1 cup chopped nuts (walnuts or pecans preferred)
Instructions
- Preheat your oven to 350°F (175°C). lightly grease a 9×13-inch baking pan or line it with parchment paper for easy removal.
- Make the crust: Combine graham cracker crumbs and melted butter in a medium bowl until evenly moistened. press mixture firmly into the bottom of the pan,creating an even,compact layer.
- Layer condensed milk: Pour the entire can of sweetened condensed milk evenly over the crust,ensuring full coverage for that signature gooey consistency.
- Add chips: Sprinkle chocolate and butterscotch chips evenly over the condensed milk layer,allowing them to blend as they melt into the bars.
- Sprinkle coconut and nuts: Distribute the shredded coconut and chopped nuts evenly, ensuring every square gets a perfect crunch.
- Bake: Place in the oven and bake for 25-30 minutes until the top is golden and set but still slightly soft to the touch. Avoid overbaking to maintain gooey edges.
- cool fully: Let the bars cool in the pan on a wire rack for at least 1 hour before cutting to allow the layers to firm up properly.
- Slice and enjoy: Cut into 2×2 inch squares using a sharp knife, wiping it clean between cuts for sharp edges.
Tips for Success
- Even layering: Taking time to distribute ingredients evenly prevents clumping and ensures balanced flavors.
- Nut toasting: Lightly toast nuts before chopping to amplify crunch and deepen flavor without adding oil.
- Use parchment paper: Line your pan to easily lift bars without crumbling.
- Storage: Keep bars in an airtight container at room temperature for up to 5 days or freeze for up to 3 months.
- Make-ahead: These bars improve slightly after resting overnight, allowing flavors to meld perfectly.
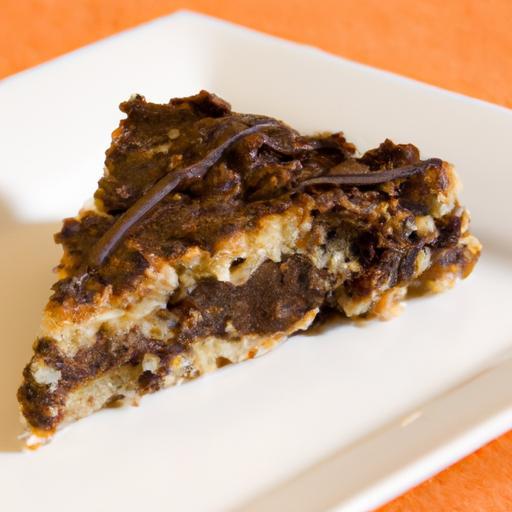
Serving Suggestions
Present your Seven Layer Magic Bars on a decorative platter, garnished with a dusting of powdered sugar or a drizzle of melted chocolate for visual appeal. For a decadent treat, serve alongside a scoop of vanilla ice cream or fresh berries to cut through the richness.
Perfect for holiday gatherings, potlucks, or afternoon tea, these bars pair exceptionally well with freshly brewed coffee or a creamy chai latte, enhancing their warm, comforting nature.
| Nutrient | Per Serving (1 bar) |
|---|---|
| Calories | 280 |
| Protein | 3g |
| Carbohydrates | 35g |
| Fat | 15g |

For those interested in exploring more classic desserts with layered textures, check out our Classic Layered Dessert Recipes.To understand the science behind why sweetened condensed milk creates such luscious textures,visit CandyUSA’s guide on condensed milk for expert insight.
Q&A
Q&A: Seven Layer magic Bars – A Deliciously Layered Treat Guide
Q1: What exactly are Seven Layer Magic Bars?
A: seven Layer Magic Bars are a decadent dessert made by layering simple ingredients to create a sweet,gooey,and crunchy treat. Traditionally, they include a buttery graham cracker crust topped with layers of sweetened condensed milk, chocolate chips, butterscotch chips, shredded coconut, nuts, and sometimes vanilla or other flavor enhancements. Each layer melds together as it bakes, creating a magical combination of textures and flavors that’s hard to resist.
Q2: Why are they called “Magic Bars”?
A: The “magic” in Magic Bars comes from the simplicity and the conversion during baking. You start by layering each ingredient-no mixing needed-and then, as the bars bake, the sweetened condensed milk binds the ingredients together.The result is a luscious, multi-textured dessert that feels like it appeared by magic!
Q3: Can Seven Layer Magic Bars be customized?
A: Absolutely! One of the best things about these bars is how versatile they are.While the classic recipe calls for chocolate chips,butterscotch chips,shredded coconut,and nuts,you can swap or add other elements like white chocolate chips,dried fruit,or different types of nuts to suit your taste. Just keep in mind that the magic lies in the balance of chewy, crunchy, and sweet layers.
Q4: how do I ensure the bottom crust doesn’t get soggy?
A: The key is to press the graham cracker crust firmly into the pan and pre-bake it for about 5 minutes before adding the layers. This step helps set the crust so it stays crisp underneath the gooey toppings. Using melted butter evenly distributed also helps create a sturdy base.
Q5: Can Seven Layer Magic Bars be made ahead of time?
A: Yes! These bars actually taste great the next day after the flavors have had time to meld. Store them in an airtight container at room temperature for up to 3 days, or in the fridge if you want them firmer. Just bring them to room temperature before serving for the best flavor and texture.
Q6: Are these bars gluten-free?
A: Traditional recipes use graham cracker crumbs, which usually contain gluten. However, by swapping in gluten-free graham crackers or an alternative crumb base, you can make these bars gluten-free without losing any of the magic.
Q7: What’s the best pan to use for baking Seven Layer Magic Bars?
A: A 9×13-inch baking pan is the classic choice, giving you bars that are the perfect size and thickness. For a portable or individual version, mini muffin tins or smaller pans work well too, just adjust baking time accordingly.
Q8: Can I freeze Seven Layer magic Bars?
A: Definitely! To freeze, wrap the bars tightly in plastic wrap and then foil to prevent freezer burn. They keep well for up to 2 months. When you’re ready to enjoy, thaw them overnight in the fridge and bring to room temperature before serving for that melt-in-your-mouth perfection.
Q9: What’s a fun twist to try on the classic Seven Layer Magic Bars?
A: Try adding a sprinkle of sea salt on top before baking for a sweet-salty contrast, or incorporate a layer of crushed peppermint candies around the holidays for a festive touch. Another idea is to swirl in some peanut butter or caramel for extra indulgence.Q10: Why have Seven Layer Magic Bars stood the test of time?
A: Their simplicity, versatility, and irresistible combination of textures make them a perennial favorite. Whether it’s a potluck, a holiday dessert, or an everyday treat, these bars hit that perfect sweet spot and bring a bit of homemade magic to any occasion.
To Conclude
As you savor the idea of these indulgent Seven Layer Magic Bars, it’s clear that their charm lies not just in their rich, buttery base or gooey chocolate topping, but in the harmonious dance of every delicious layer coming together. whether you’re a seasoned baker or a curious kitchen adventurer, this guide invites you to experiment, customize, and delight in the magic that unfolds with each bite. So go ahead-gather your layers, embrace the sweetness, and create your own slice of layered heaven that’s as enchanting to make as it is indeed to eat. After all, in the world of treats, magic is just a layer away.